
How to Replace a Shower Cartridge: Tools, Steps and Costs
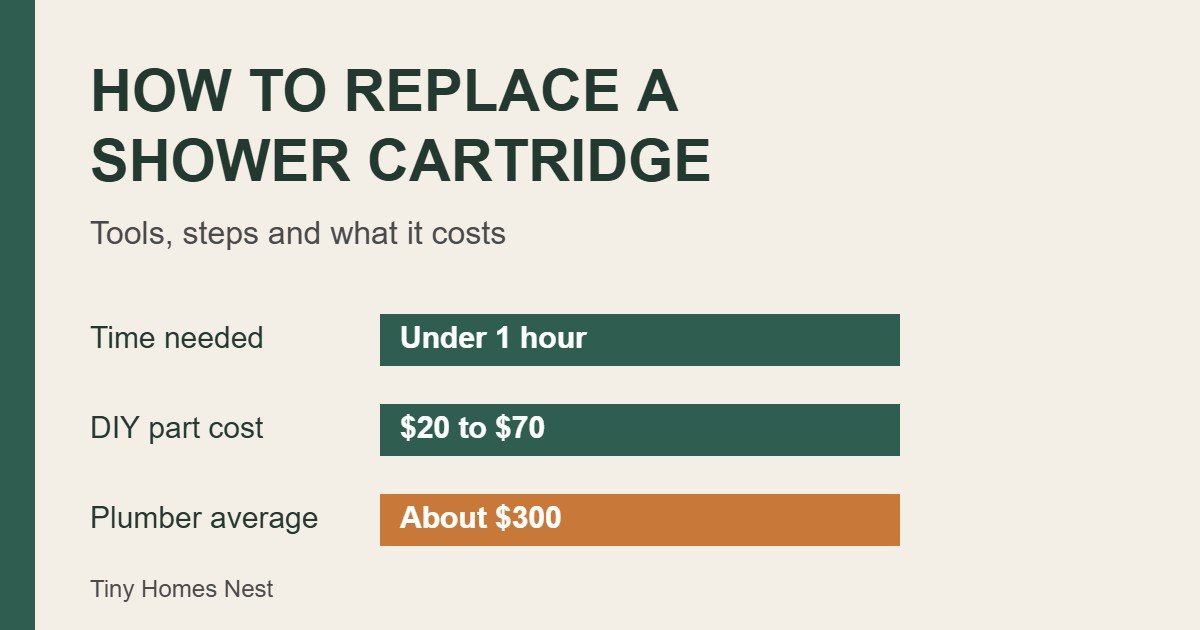
A shower that drips after you shut it off or runs lukewarm when you wanted hot or fights you every time you turn the handle is usually telling you one thing. The shower cartridge inside the wall valve has worn out. The good news is that this is one of the most approachable plumbing repairs in a home. Most people can replace a shower cartridge in under an hour with a few basic tools and a part that costs less than a takeout dinner for two.
This guide shows you how to replace a shower cartridge from start to finish. You will learn what a cartridge does and how to tell whether yours has failed and how to remove a stuck one. You will also see what the repair costs when you do it yourself and what a plumber charges and how to handle the most common brands such as Moen and Delta and Kohler. By the end you will know whether this is a weekend win or a job for a pro.
What Is a Shower Cartridge?
A shower cartridge is the small cylindrical valve hidden behind your shower handle. When you turn the handle it slides or rotates inside the valve body and controls how much hot and cold water flows through. In a single handle shower the cartridge also mixes the two so you get one comfortable temperature. Sink faucets use a similar part so see how to replace a faucet cartridge if the kitchen or bathroom tap is the one that drips.
Inside most cartridges you will find rubber seals and O-rings and ports that line up with the hot and cold supply lines. Those seals are what stop water from leaking when the shower is off. Over years of use they harden and crack and collect mineral deposits. Once that happens water slips past and the shower starts to drip or the handle stops working smoothly.
Cartridges are made from plastic or brass or a mix of both with ceramic discs in some designs. Brass and ceramic cartridges usually cost more but they tend to last longer than plain plastic ones.
Signs You Need to Replace the Shower Cartridge
Before you buy parts it helps to confirm the cartridge is the problem. Look for these signs:
- The shower drips after you turn it off. A steady drip from the shower head or tub spout when the handle is closed is the classic symptom.
- The handle is hard to turn. Mineral buildup on the cartridge makes the handle stiff or gritty.
- The temperature swings or never gets hot. A worn cartridge can fail to mix hot and cold water evenly.
- Water pressure is weak. Debris or scale inside the cartridge can choke the flow.
- The handle does not stop at the right position. Water may come out at the wrong setting or refuse to shut off completely.
- The pipes bang when you turn the water on. This can point to a damaged cartridge but it can also come from high water pressure so keep that in mind.
A cartridge typically lasts somewhere between five and ten years depending on how hard your water is and how often the shower is used. If your home has hard water and you have never cleaned or replaced the cartridge a failure is just a matter of time.
Shower Cartridge Types
Knowing your shower cartridge types saves you from buying the wrong part. The main styles are:
- Single handle cartridges: One handle controls both volume and temperature. These are the most common in modern homes.
- Dual handle cartridges: Separate hot and cold handles each have their own stem or cartridge. You replace the one on the leaking side.
- Diverter cartridges: Found in tub and shower combinations. These send water up to the shower head or down to the tub spout.
- Pressure balancing cartridges: These hold the temperature steadier when someone flushes a toilet or turns on a faucet elsewhere in the house.
- Thermostatic cartridges: These let you set an exact temperature and keep it constant. They cost more and are found in higher end showers.
The type is only half the answer. Even two single handle cartridges that look alike can differ in length and spline count and the number of ports. That is why the best way to buy the right part is to bring the old one to the store or match it by brand and model number.
How to Identify Your Shower Cartridge
The right replacement comes from knowing your valve. There are three reliable ways to find it.
- Find the brand name. Look at the handle and trim plate and any badge on the faucet. The brand tells you which parts catalog to search.
- Check the model number. Some trim plates or the valve body behind the wall carry a model number. Once the cartridge is out you can often read a part number printed on it. Moen cartridges such as the 1222 and Delta cartridges such as the RP19804 are examples of these part numbers.
- Compare the old cartridge to the new one. Match the length and the shape of the stem and the position of the notches and ports side by side before you pay. If you cannot identify the brand take the old cartridge to a plumbing supply store and ask for a match.
If the faucet is very old or the brand has gone out of business a universal replacement cartridge or a full valve upgrade may be your best option.
Tools and Materials You Will Need
Gather everything first so you are not hunting for a tool with the water off. For most jobs you need:
- A replacement cartridge that matches your valve
- Screwdrivers (flat and Phillips)
- A set of hex keys (Allen wrenches)
- Pliers or a cartridge puller
- A rag or towel to cover the drain
- Plumber’s grease (silicone based)
- A utility knife and caulk if the trim has been sealed to the wall
- A flashlight
A cartridge puller is a specialty tool that grips the cartridge and pulls it straight out of the valve. It usually costs $10 to $20 and is worth buying if your cartridge is stuck. Many hardware stores sell brand specific pullers for popular valves.
How to Replace a Shower Cartridge Step by Step
Here is the full process to replace a shower cartridge. The exact trim parts vary by brand but the sequence is the same almost everywhere.
Step 1: Turn Off the Water
Look for shutoff valves (called stops) built into the valve behind the trim. If your shower has them you can close them with a screwdriver and keep the rest of the house running. If not turn off the main water supply and open a faucet on a lower floor to drain the lines.
Stuff a rag into the tub drain so a dropped screw cannot disappear.
Step 2: Remove the Handle
Pry off the decorative cap on the handle with a small flat screwdriver. Behind it you will find a screw. Some handles use a hex set screw instead. Loosen it and pull the handle straight off the stem. If it sticks wiggle it gently and avoid prying hard against the tile.
Step 3: Remove the Trim Plate
Unscrew the trim plate (the escutcheon) from the wall. If it has been caulked in place score the caulk line with a utility knife first so you do not chip the tile or the wall. Set the screws aside in a cup.
Step 4: Take Off the Stem Cover or Retaining Parts
Behind the trim you will see the valve and the top of the cartridge. Depending on the brand you may need to remove a plastic stem cover or a metal retaining clip or a bonnet nut that holds the cartridge in place. Pull a clip straight out with pliers. Unscrew a nut with a wrench or deep socket. Note how each part sits so you can put it back in the same order. A quick phone photo helps.
Step 5: Remove the Old Cartridge
Grasp the stem with pliers and pull straight out while twisting gently back and forth. A fresh cartridge usually comes out with firm pressure. An old one can be stuck from years of scale. If that happens use a cartridge puller and do not force it with brute strength since a cracked valve body turns a $30 repair into a major one.
Before you pull it out notice which way the cartridge faces. Most have a mark or notch that should point up or toward the hot side. Installing the new cartridge backwards swaps your hot and cold.
Step 6: Clean the Valve Body
Shine a flashlight into the valve and wipe out debris and scale. A cloth wrapped around a screwdriver works well for the inside walls. A little white vinegar loosens mineral deposits. Rinse away anything loose so it does not clog the new cartridge.
Step 7: Install the New Cartridge
Rub a thin layer of plumber’s grease on the new cartridge’s O-rings. This helps it slide in smoothly and gives the seals a longer life. Line it up with the same orientation as the old one and push it straight in until it seats fully. Re-install the retaining clip or nut or stem cover.
Step 8: Reassemble and Test
Put the trim plate and handle back on and tighten the screws gently. Turn the water back on slowly. Run the shower at both hot and cold and check for leaks around the trim. If you removed caulk apply a fresh bead along the trim and let it cure before the next shower. Our guide on how long it takes for caulk to dry explains how long to wait.
How to Remove a Stuck Shower Cartridge
A stuck cartridge is the most common reason this job goes sideways. If yours will not budge try these in order:
- Soak it. Let white vinegar sit around the cartridge for 15 to 30 minutes to loosen scale. Do not use harsh chemical drain cleaners.
- Twist while pulling. Rotate the stem a few degrees each way while pulling straight out. Do not rock it side to side.
- Use a cartridge puller. It grips the right way and pulls evenly. This beats pliers in almost every case.
- Tap gently. A light tap on the valve body with a wooden handle can break scale loose. Never hit hard.
- Know when to stop. If the cartridge snaps or the brass is corroded in place call a plumber before you damage the valve.
How Much Does It Cost to Replace a Shower Cartridge?
The cost to replace a shower cartridge depends mostly on whether you do it yourself.
- DIY: You pay for the part and any tools you do not own. Standard replacement cartridges often sell for roughly $20 to $70 while premium brass or specialty models can cost far more. This Old House lists cartridge prices from about $28 to well over $1,000 across single handle and dual handle and diverter styles.
- Plumber: The typical total for a professional replacement averages about $300 with a common range of $200 to $400. Plumbers usually charge from about $25 to $200 per hour depending on location and experience.
- Tools: Hex keys and a screwdriver and pliers are items most homeowners already have. A cartridge puller adds $10 to $20.
Several things push the price up. Brass and ceramic cartridges cost more than plastic. Thermostatic and pressure balancing models cost more than basic ones. A valve that is hard to reach or damaged by corrosion adds labor. Some manufacturers also cover cartridges under warranty so check before you buy since the part may be free or only cost shipping.
If the leak has caused water damage behind the tile you could be looking at a bigger repair. For a sense of what bathroom plumbing work costs in general see our plumbing repair cost guide.
Replacing Moen, Delta, Kohler and Pfister Cartridges
Each brand has its own quirks. These tips help when you are matching parts.
- Moen: Many Moen valves use a cartridge held by a metal retaining clip. Pull the clip straight out and then pull the cartridge. The old style Moen cartridges and the newer Posi-Temp types are not interchangeable so match the part number.
- Delta: Delta single handle cartridges often come with a stem and a bonnet or retaining nut. Delta offers several series that look similar so check the model before you buy.
- Kohler: Kohler valves vary by line. Some use a stem and a cartridge together in one assembly. Check the model number printed on the trim or the valve.
- Pfister: Pfister valves frequently use numbered cartridges. Write down the number from the old cartridge before you shop.
- American Standard: Many American Standard showers use a cartridge you can reach after removing the handle and a retaining nut. Match by model number.
When in doubt lean on the brand’s own parts finder or the old cartridge in your hand. A wrong cartridge may fit the opening but fail to seal or to mix temperature properly.
When to Call a Plumber Instead
You can replace a shower cartridge confidently in most cases. Call a professional if:
- There are no shutoff valves and the main shutoff will not close. Working on live pipes is risky.
- The valve body is cracked or heavily corroded. Replacing the whole valve means opening the wall.
- The leak shows up in the wall or ceiling below. That points to a bigger problem than the cartridge.
- You cannot identify the valve. A plumber can match it quickly.
- A stuck cartridge snaps. Leave the extraction to someone with the right tools.
If you are planning to open the wall anyway consider upgrading the whole valve and fixtures. Our bathroom remodel cost guide shows what a full update runs. For more projects you can take on yourself see our DIY home improvement guide.
Tips to Make a New Shower Cartridge Last Longer
A little care adds years to a new cartridge:
- Use plumber’s grease on the seals. It protects the rubber and makes the next removal easier.
- Clean mineral buildup now and then. A vinegar soak on the trim and shower head keeps scale from creeping into the valve.
- Consider a water softener in hard water areas. Scale is the number one killer of cartridges.
- Do not overtighten. Crushed seals fail early.
- Operate the handle gently. Slamming it shut wears out the cartridge faster.
If your shower head is also dripping once the cartridge is fixed see our guide on how to fix a leaking shower head since a worn seal at the head can mimic a cartridge problem.
Frequently Asked Questions About Replacing a Shower Cartridge
How do you replace a shower cartridge?
Turn off the water and remove the handle and the trim plate. Take off any retaining clip or nut and pull out the old cartridge. Clean the valve and install the new cartridge in the same orientation with a little plumber’s grease on the seals. Reassemble and test for leaks.
How much does it cost to replace a shower cartridge?
A plumber typically charges about $200 to $400 with an average near $300. Doing it yourself usually costs the price of the cartridge and perhaps a $10 to $20 puller. Standard cartridges often cost roughly $20 to $70.
How do I know if my shower cartridge is bad?
Dripping after you turn the water off is the clearest sign. A stiff handle and uneven temperature and weak flow also point to a worn cartridge.
How do you remove a stuck shower cartridge?
Soak the area in white vinegar and twist the stem gently while pulling straight out. A cartridge puller works better than pliers. If the cartridge snaps or will not move stop and call a plumber.
Do I need to turn off the water to replace a shower cartridge?
Yes. Close the shutoff stops on the valve if it has them. If not turn off the main supply to the house and drain the lines before you open the valve.
What is a shower cartridge?
It is the valve inside the wall that controls the flow and temperature of your shower water. The handle moves the cartridge which opens or closes the hot and cold ports.
How long does a shower cartridge last?
Many last about five to ten years. Hard water and heavy use shorten that while good seals and regular cleaning can stretch it.
Final Thoughts on Replacing a Shower Cartridge
Knowing how to replace a shower cartridge turns an annoying drip into a quick afternoon fix. Shut off the water and note how everything comes apart and match the new cartridge to the old one and take your time pulling the old part out. Most of the cost and the risk comes from rushing or buying the wrong part.
Keep a puller in your toolbox and a little plumber’s grease on hand and take a photo before you disassemble anything. If the valve looks damaged or you hit a problem you cannot solve a plumber can finish the job in a short visit. Either way a working shower is within reach today.






2 Comments